Use Airbyte Embedded
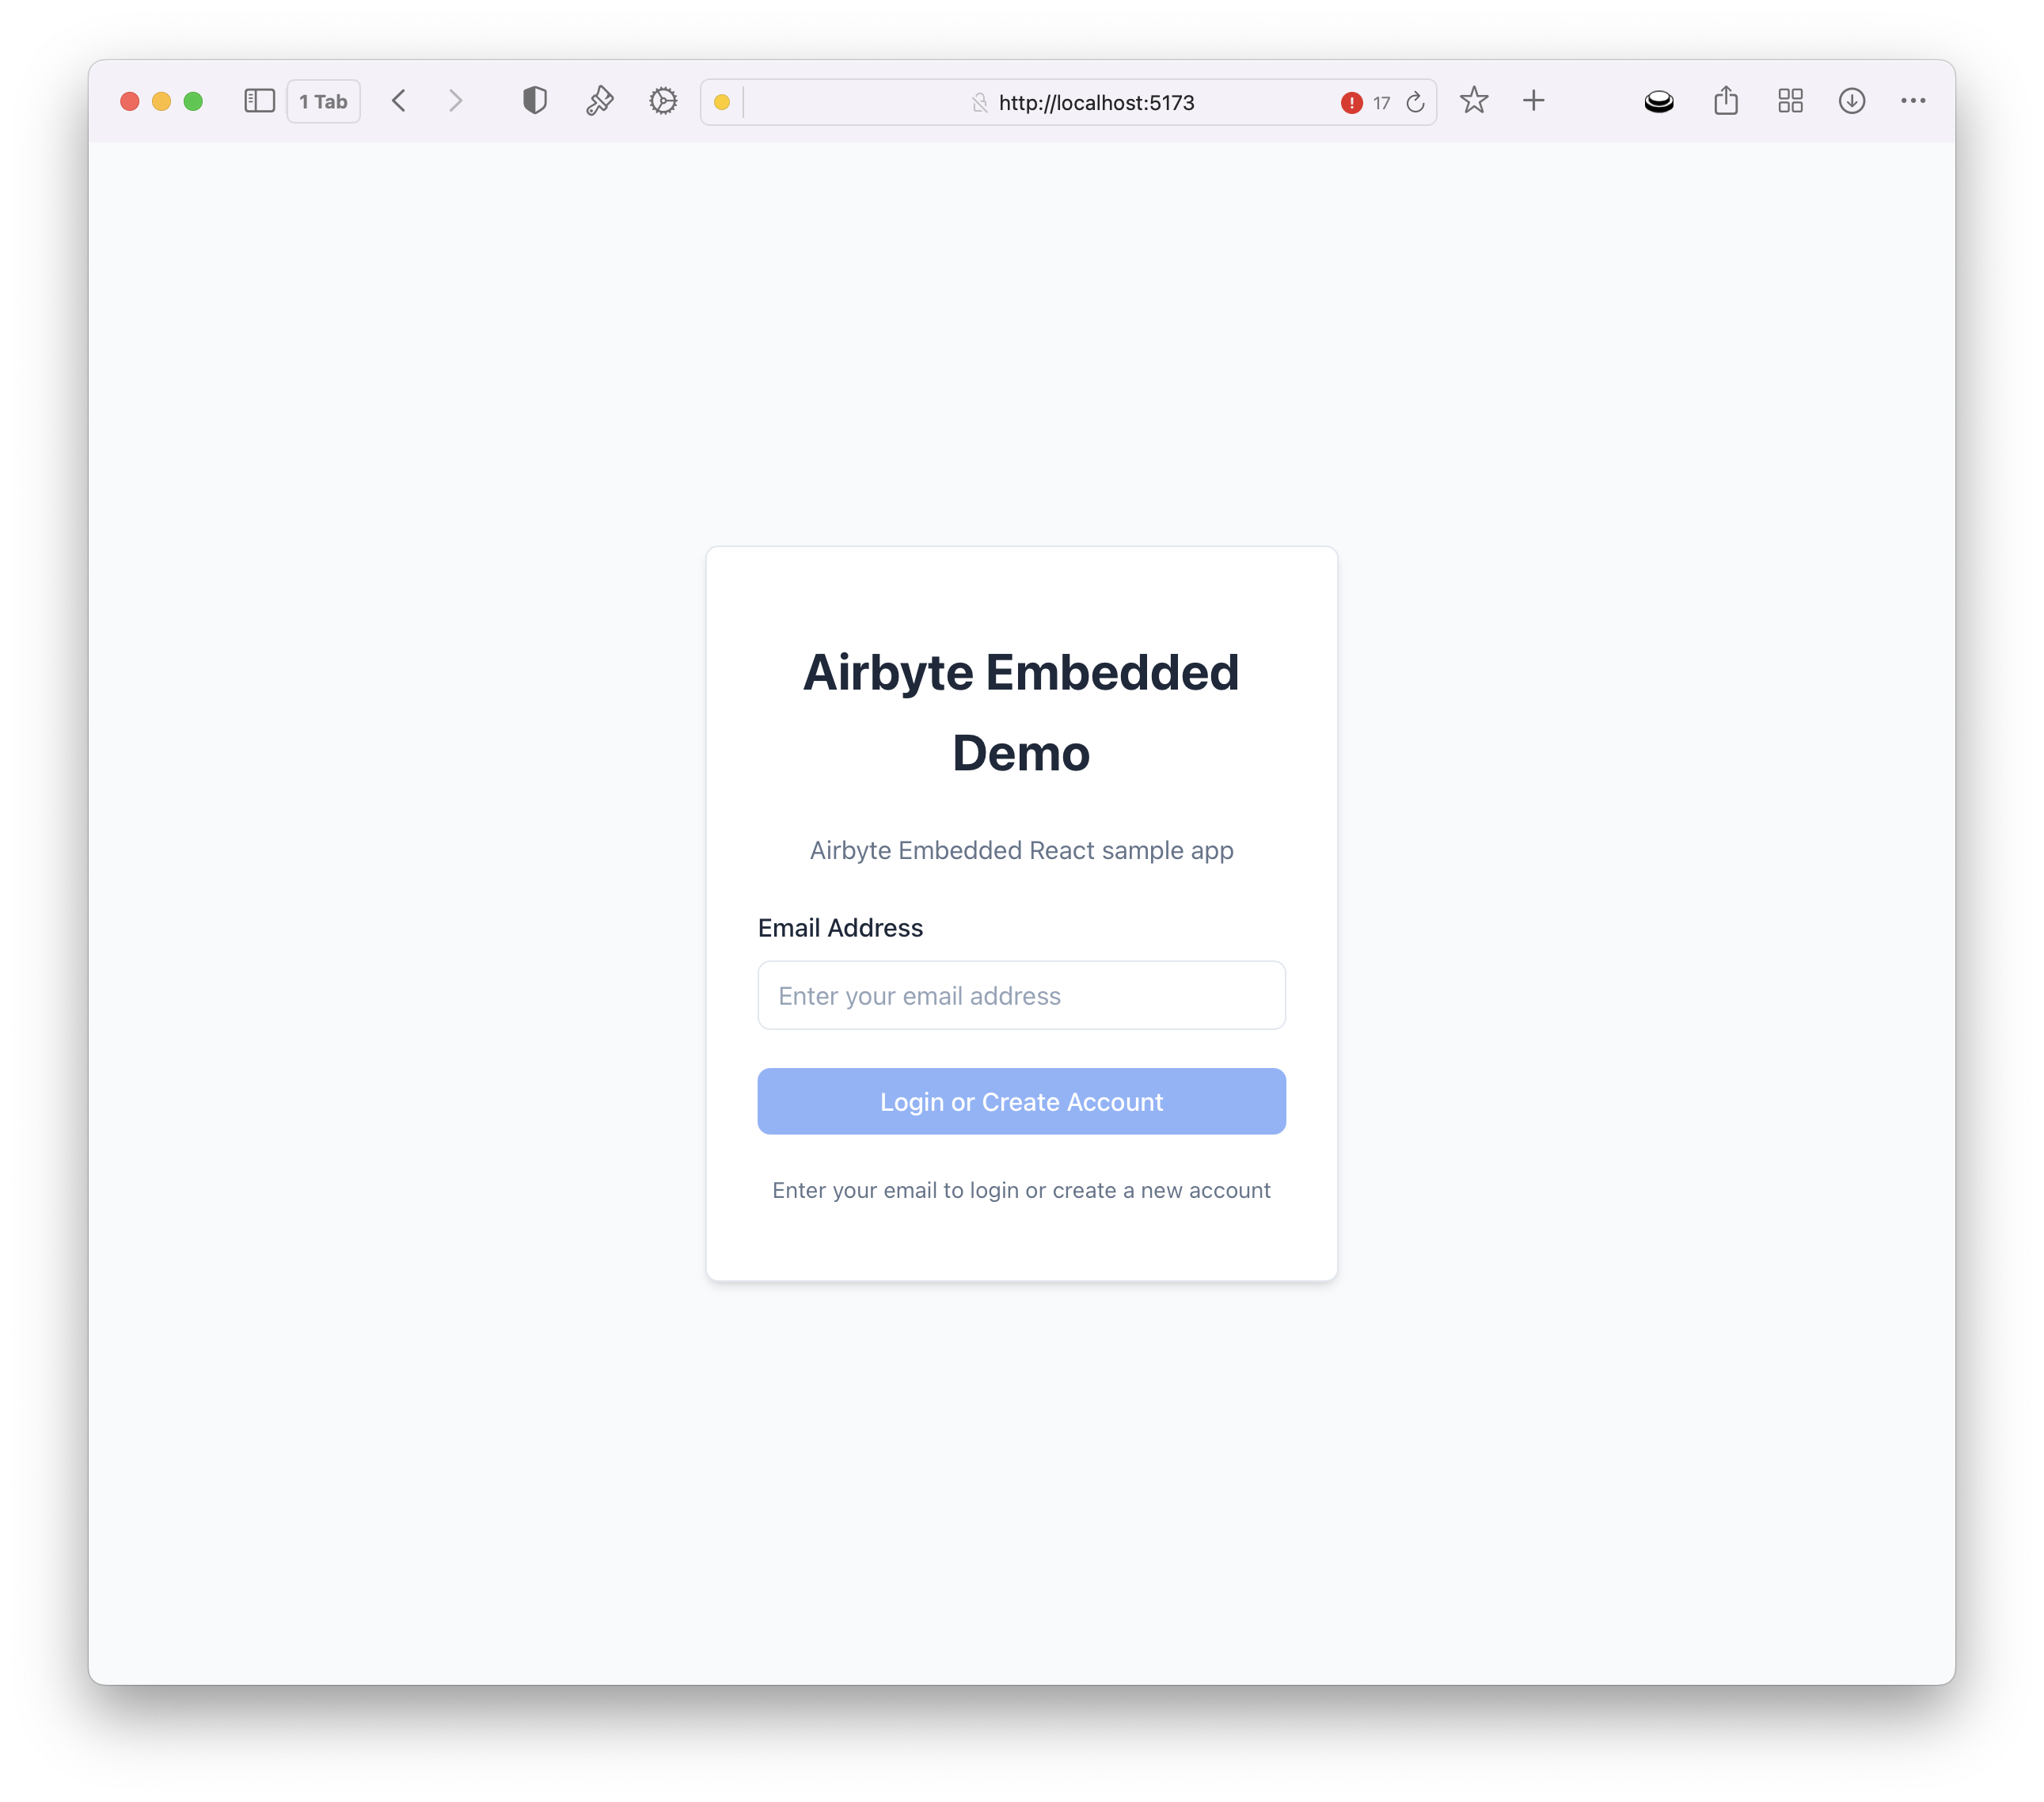
With your app up and running, you will be prompted to enter your web password before continuing. After authentication, you will be presented with a screen to allow customers to onboard by adding their email address.
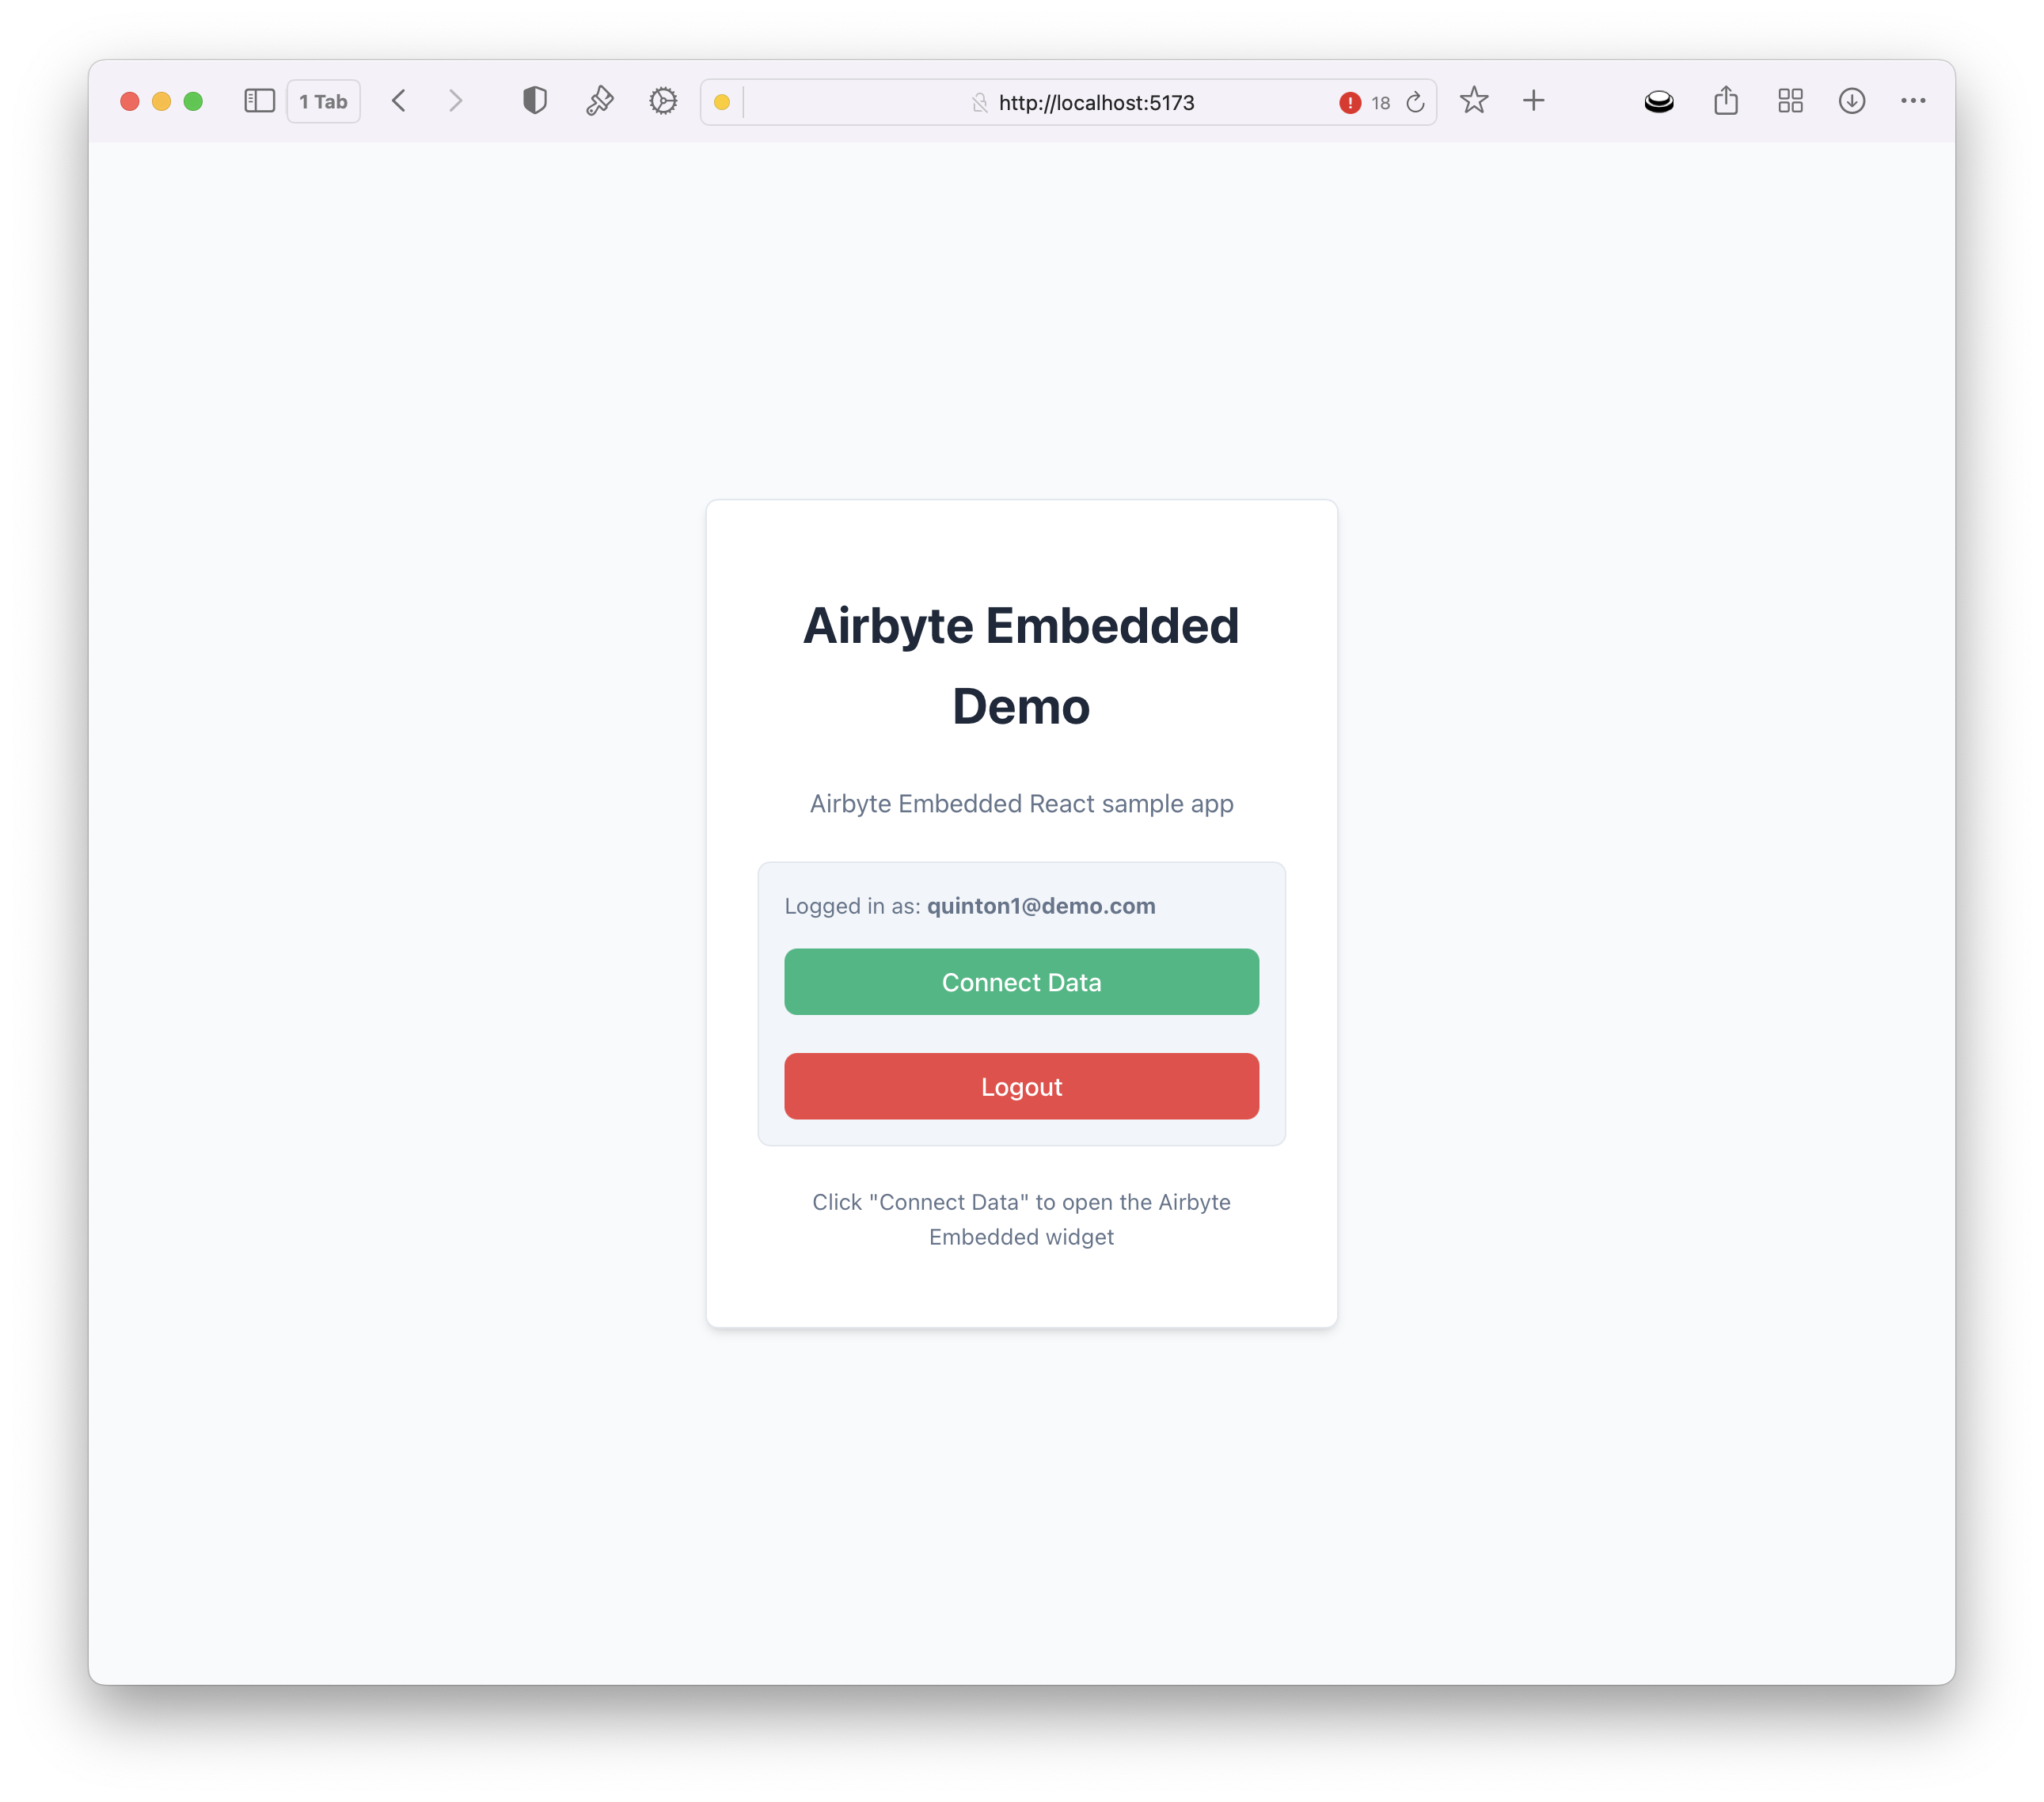
Once a user record is created, the customer can tap Connect Data to configure which source they wish to connect.
This will render the Airbyte Embedded widget. This widget displays a list of available connectors.
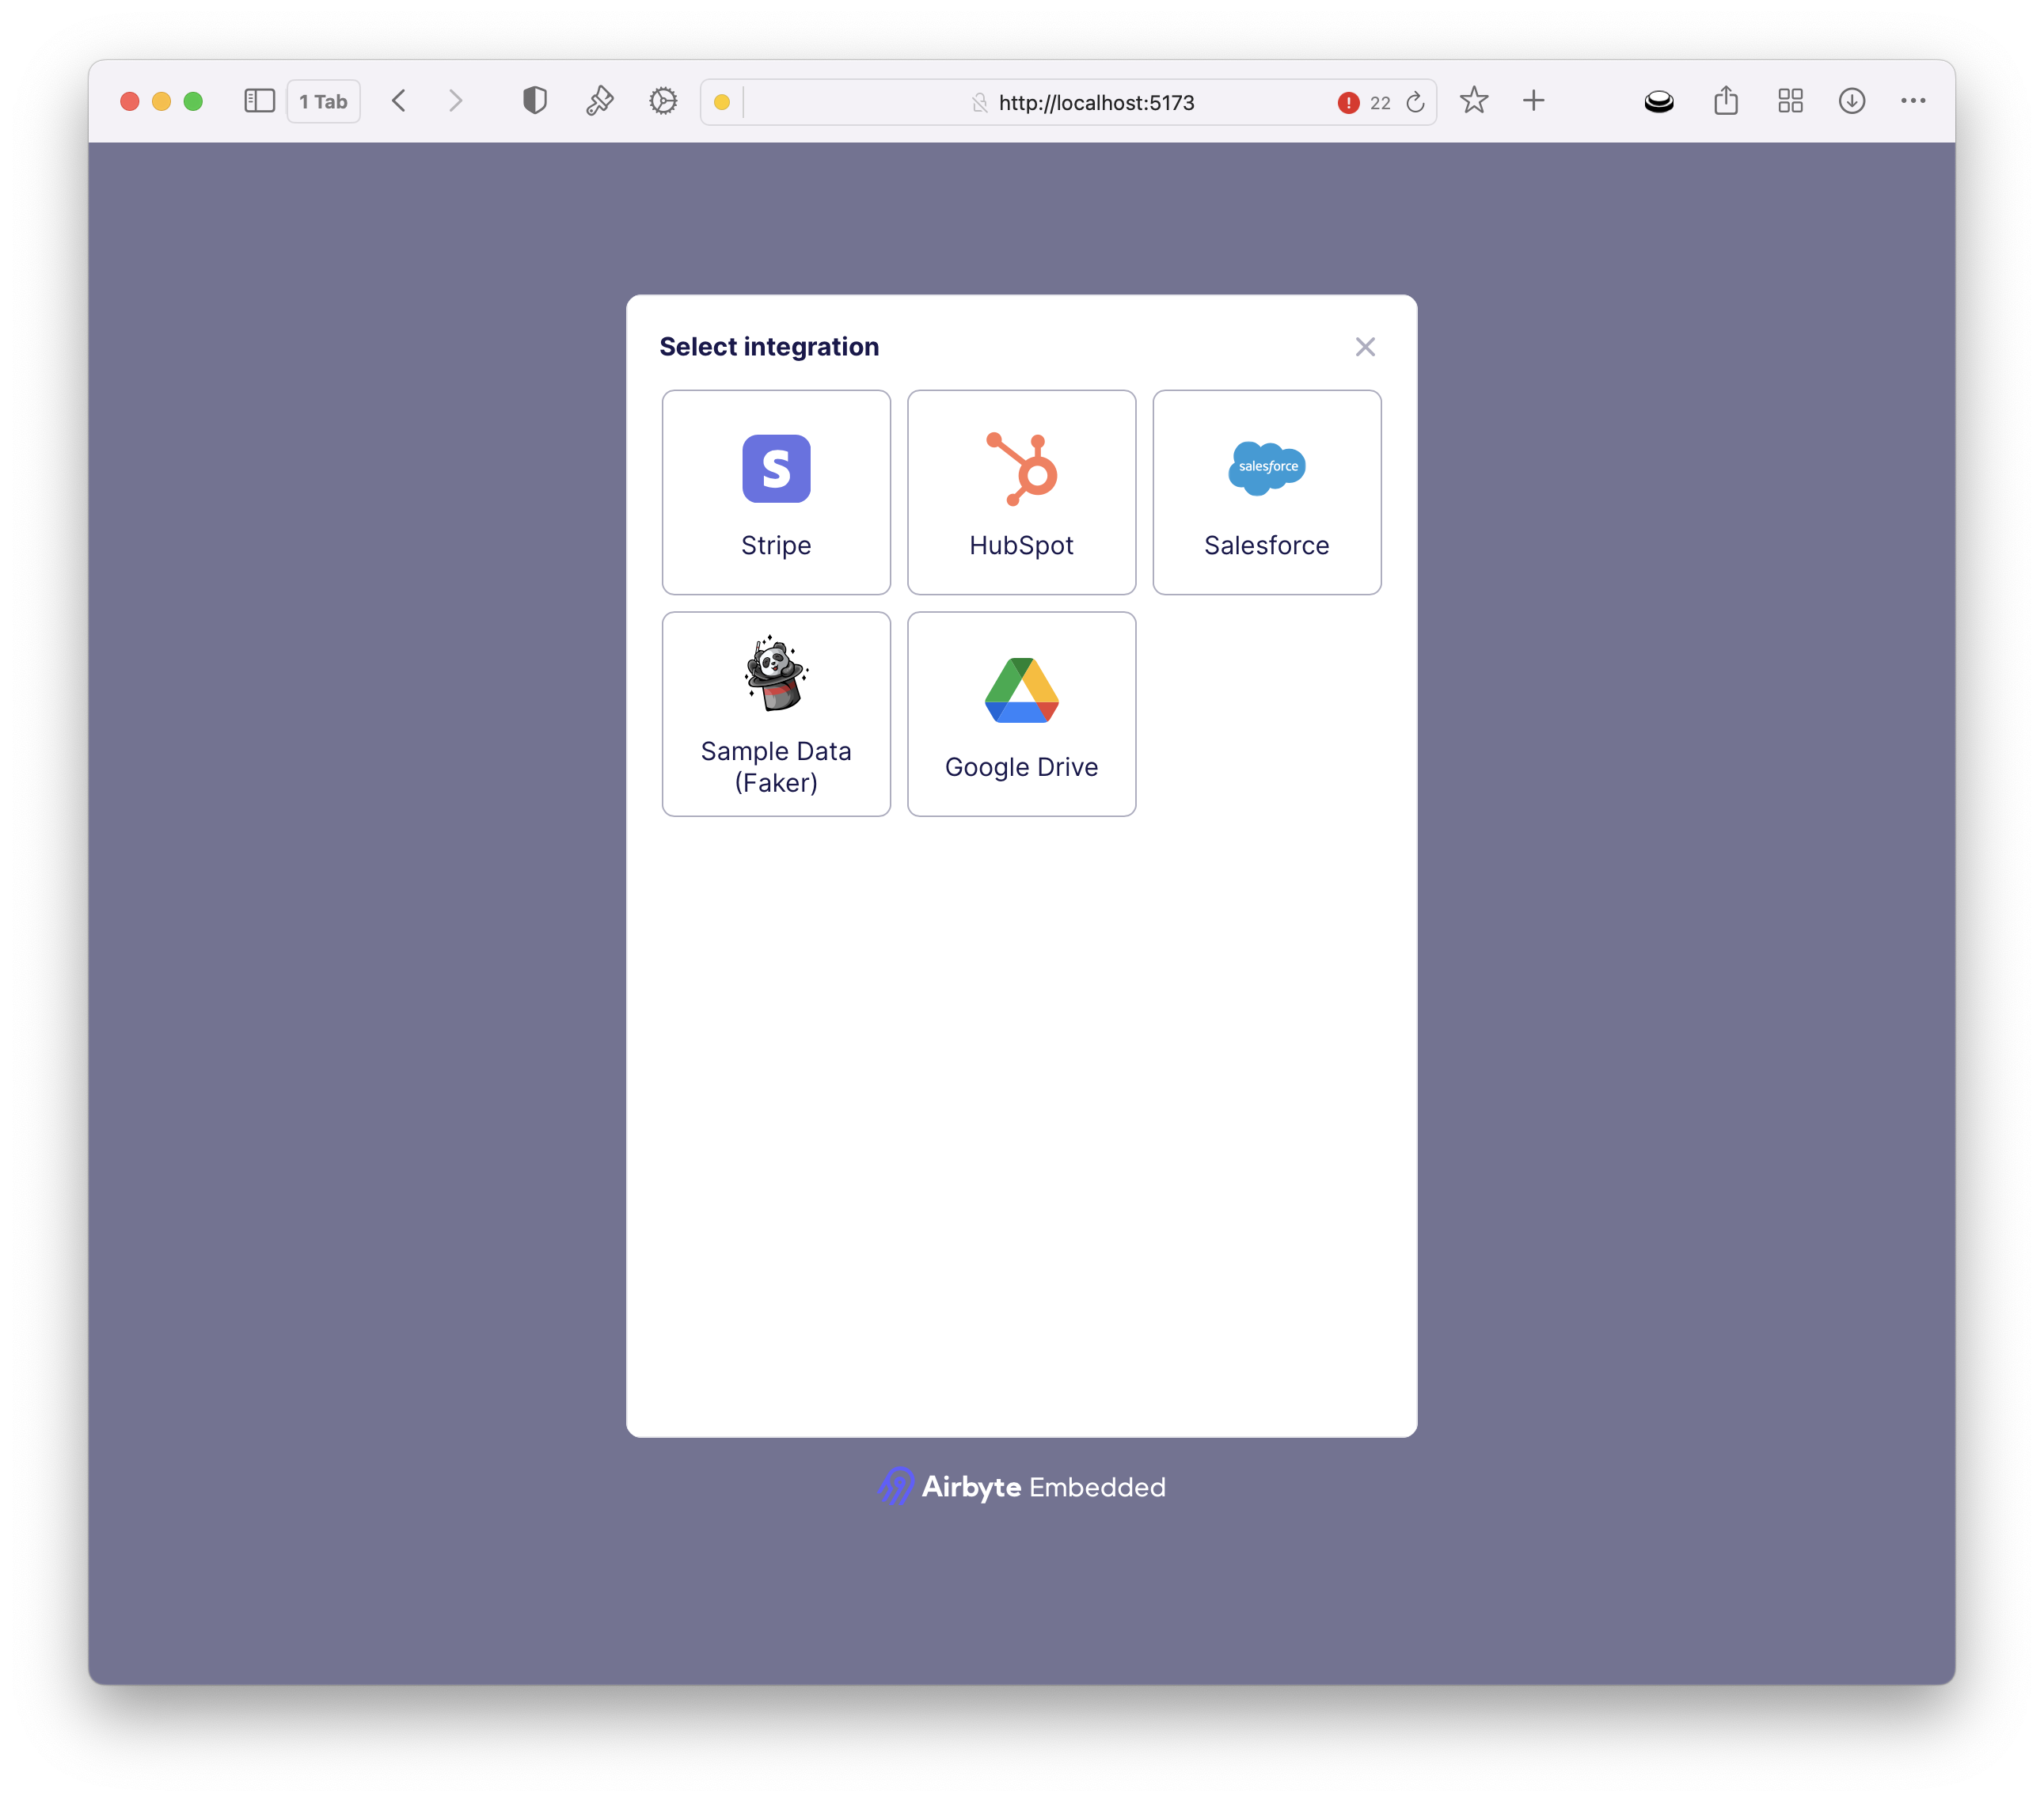
Customers can select a source and input their configuration. Upon save, a customer workspace will be created via Airbyte Embedded with the customer’s source configuration and a data pipeline created to sync data to your AI destination store. In this instance, S3.
External User Id
The sample application uses the customer's email as the unique external id to define a workspace within Airbyte Embedded. For production usage, it is recommended to use a unique identifier specific to your business such as a UUID.
If you need to change this logic, pass in a different id to the server token endpoint /server/server.js or add custom logic into /src/airbyteService.js
Line 108: `api.generateWidgetToken(req.user.email)`
Versioning the Widget
It is generally recommended that you pull in a specific version of any npm package to prevent unexpected changes. If you are pulling in this package as a script, you can do this by importing it as:
<script src="https://cdn.jsdelivr.net/npm/@airbyte-embedded/airbyte-embedded-widget@0.4.2"></script>
In addition, within the package.json, if you wish to pin to a minor version, use the following syntax:
"@airbyte-embedded/airbyte-embedded-widget": "^0.4.2"